I mentioned the BoinxTV Video mixing Software sometime ago, but haven't had the time to test it on the Apple MacBook Pro and produce an episode of our church's video podcast on it until last weekend.
Our church video ministry already has a 2 channel video mixer, so my use of BoinxTV was going to be cut out the post production required to add a logo and lower 3rds to the video podcast, adding these features live while the church service was being recorded meaning that I would have a more professional looking video and not have to spend time later at home to do this (I don't have the time anyway, which is why there are none of these features currently included in our video podcasts.
Since this was my first time of really playing with BoinxTV, I needed to do some pre-production thinking of the layers required, what settings I needed and how it would work in the video podcast.
To give you a fair idea of what you might need to run BoinxTV on your MacBook Pro, I'm going to post the specs of my Apple laptop here.
Model Name: MacBook Pro
Model Identifier: MacBookPro3,1
Processor Name: Intel Core 2 Duo
Processor Speed: 2.4 GHz
Number Of Processors: 1
Total Number Of Cores: 2
L2 Cache: 4 MB
Memory: 4 GB
Bus Speed: 800 MHz
Boot ROM Version: MBP31.0070.B07
SMC Version: 1.16f10
Serial Number:
Sudden Motion Sensor: State: Enabled
In order to connect the switched output of the CMX07 Video Mixer, I used a Sony DV camcorder as a bridge, with the compsite video and stereo audio being fed into the camcorder input connectors and the firewire connector of the camcorder being connected to the MacBook Pro.
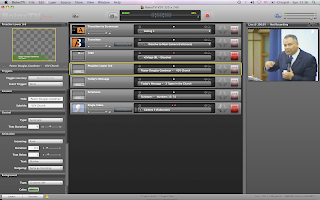
Because I was going to use BoinxTV only for producing a video podcast for the internet, I had created a template that would record the output file at a resolution of 320 x 240 pixels, so on firing up the BoinxTV software on my MacBook Pro, I open this document. The first thing I had to do was add a new camera source to the software to allow the software to recognise my firewire connected DV camcorder.

The system resources meter showed that it was using about 40% processor with only BoinxTV and nothing else running except one instance of Finder on the MacBook Pro.
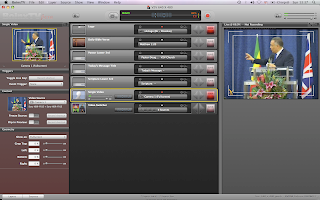
I created a new template for a larger video output of 640 x 480 and opened this with BoinxTV.

Note that I have the video layer selected in this case, and that resources are now running at 82%. It was apparent that my MacBook laptop would not be able to handle the 640 x 480 video output size (I hadn't pressed the record button yet), so I closed down the template and reloaded the smaller template into BoinxTV.
I now started playing around with the lower 3rd settings to get something that would be suitable for my video podcast, I had already added the logo layer, and imported the appropriate image for use. When I had what I was happy with, I then decided it was time to try to recording a video to disk, so I plugged in some headphones to monitor the sound, but couldn't hear anything!
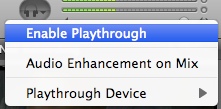
The problem was later traced to the fact that I hadn't enabled the audio pass through feature.
 Audio Pass through Icon
With the audio levels sorted out, and the layers prepared, I was ready to record my first video podacst, so I clicked the record button, but the recording stopped after 1 minute, which turned out to be because the timer recording was enabled on BoinxTV.


In the end I was able to record a few minutes of the church service using BoinxTV and tried out some of the effects of this live video production software for the Mac.
My impressions of the software are mixed at the moment, I like the features that it possesses, but until I'm able to fully test it on a more powerful Apple Mac, I wouldn't be able to say if it will be used for the actual total production of our videos.
